Custom Webhooks in Formora offer a powerful and flexible way to send your form submission data to virtually any external application, custom script, or backend system that can accept HTTP requests. This is ideal for bespoke integrations, connecting to internal tools, or services not covered by Formora’s native integrations.Documentation Index
Fetch the complete documentation index at: https://docs.formora.site/llms.txt
Use this file to discover all available pages before exploring further.
What is a Webhook?
A webhook is an automated message sent from one application to another when a specific event occurs. In Formora’s case, when a new form submission is received for a connected form, it can trigger a webhook. This sends the submission data via an HTTP request (typically POST, PUT, or GET) to a URL you specify (your “webhook endpoint”).Use Cases for Custom Webhooks
- Custom Backend Integration: Send data directly to your company’s internal database or backend application.
- Trigger Serverless Functions: Invoke AWS Lambda, Google Cloud Functions, Azure Functions, or other serverless platforms with form data.
- Connect to Niche or In-House Tools: Integrate with specialized CRMs, ERPs, or proprietary systems.
- Build Custom Notification Systems: Create tailored email, SMS, or other notification workflows beyond Slack/Discord.
- Data Warehousing: Pipe submission data into data lakes or warehouses for advanced analytics.
- Real-time Data Processing: Send data to systems that need to act on it immediately.
Setting Up a Custom Webhook in Formora
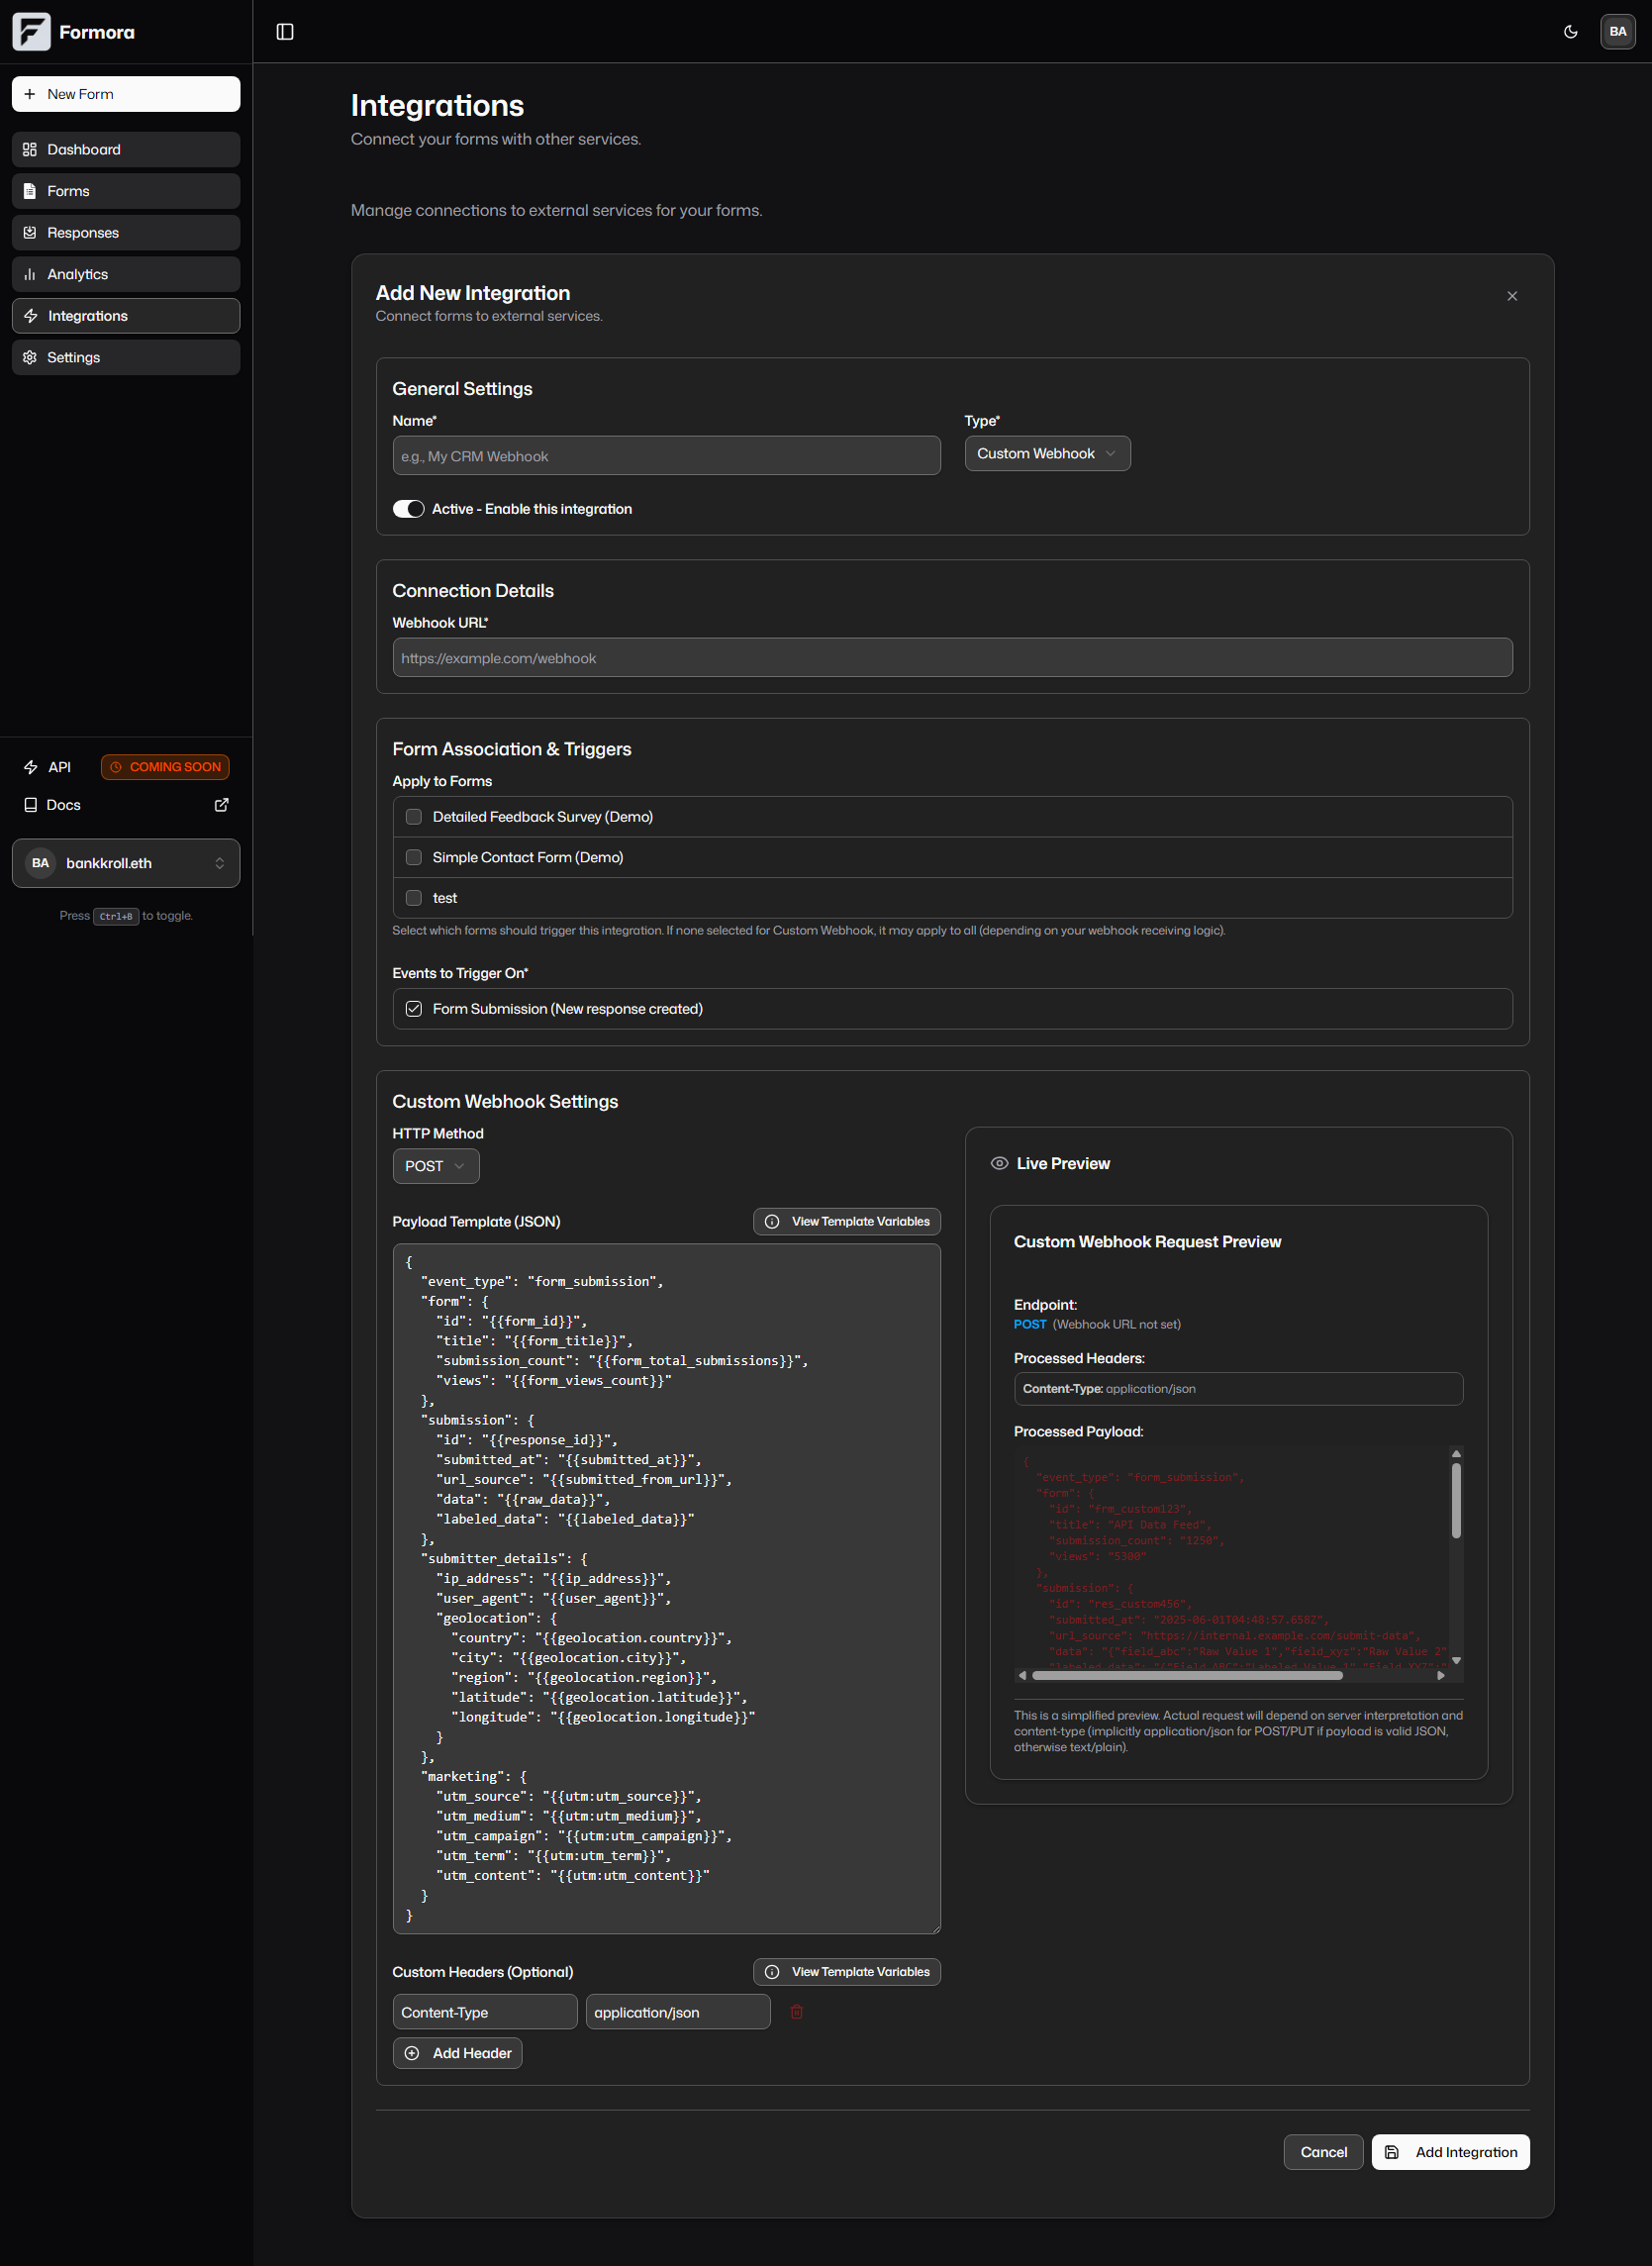
You configure Custom Webhooks from the “Integrations” section of your Formora dashboard using theIntegrationsList and CustomWebhookBuilder components.
Navigate to Integrations
Go to the main “Integrations” hub in your Formora dashboard (usually
/dashboard/integrations).Add or Edit Integration
Click “Add New Integration” and select “Custom Webhook” as the type, or edit an existing one.
Configure Webhook Details
The
IntegrationsList component allows you to set general parameters:- Integration Name: A friendly name for this webhook setup (e.g., “Send Leads to Sales CRM”).
- Webhook URL (Endpoint URL): (Required) The publicly accessible URL of your external service that will receive the webhook data. It must handle the HTTP method you select.
- Select Forms: Choose which of your forms should trigger this webhook upon submission. If none are selected, it may apply to all forms (verify behavior).
- Active: Toggle to enable or disable this webhook configuration.
- Events: By default, this is set to
form_submission. Formora sends the webhook when a new submission is successfully received.
Define HTTP Method, Headers, and Payload (CustomWebhookBuilder)
Within the form for adding/editing a Custom Webhook, the
CustomWebhookBuilder section appears:- HTTP Method: Choose
POST,PUT, orGET.POSTis standard for sending new data.GETrequests with this builder will typically ignore the payload body; data for GET usually goes in URL parameters. - Custom Headers (Optional): Define custom HTTP headers. Each header has a
Keyand aValue.- Crucial for Authentication: e.g.,
Authorization: Bearer {{secret:YOUR_API_TOKEN}}(using a template variable for a secret stored in Formora). - Content Type: Default is
Content-Type: application/json. You can modify or add others.
- Crucial for Authentication: e.g.,
- Payload Template (JSON): (Required for POST/PUT) Formora provides an editor for the JSON payload. You have full control over its structure.
- A default payload is provided (see
DEFAULT_CUSTOM_PAYLOADinIntegrationsListfor its structure), rich with template variables. - You can use the “View Template Variables” guide (part of
CustomWebhookBuilder) to easily copy and paste available variables like{{form_title}},{{response_id}},{{field:Your Label}},{{data_all_fields}}, etc.
- A default payload is provided (see
Test Your Webhook
Formora includes a “Send Test Webhook” button. This uses the current configuration (URL, method, headers, payload) to send a test request.
- The
TestWebhookResultDialogwill display the HTTP status, response headers, and response body from your endpoint. - This is essential for verifying your endpoint receives data correctly and your configuration is valid before activating for live submissions.
For testing local endpoints or those behind a firewall, services like Webhook.site, Pipedream, or ngrok can be very helpful by providing a temporary public URL.
Default Payload Structure Example
Formora’sDEFAULT_CUSTOM_PAYLOAD (visible in IntegrationsList.tsx) provides a comprehensive starting point:
Receiving and Processing Webhook Data
If you are developing the service that will receive Formora’s webhooks:- Endpoint Requirements: Your URL must be publicly accessible and configured to accept requests using the HTTP method you selected (e.g., POST).
- Parse JSON: For POST/PUT, the incoming request body will contain the JSON payload you defined. Your code will need to parse this JSON.
- Respond Appropriately: Your endpoint should return an HTTP
2xxstatus code (e.g.,200 OK,201 Created,202 Accepted,204 No Content) to acknowledge successful receipt. Formora’sTestWebhookResultDialogwill show this response. If Formora receives an error status (4xxor5xx) from your live endpoint, it may attempt to retry the webhook (behavior depends on Formora’s retry policy). - Security Best Practices:
- Use HTTPS: Always use
httpsfor your webhook URL. - Verify Requests: If you configured a secret token in a custom header (e.g.,
Authorization: Bearer {{secret:MY_TOKEN}}), ensure your endpoint validates this token. - Idempotency: Design your processing logic to be idempotent if possible (processing the same webhook multiple times won’t cause duplicate data or errors).
- Use HTTPS: Always use
Error Handling and Retries
- Test Dialog: Use the
TestWebhookResultDialogto debug initial connection issues. - Platform Logs: Check within Formora (e.g., an integration status area or activity logs, if available) for records of webhook delivery attempts and their success/failure status for live submissions.
- Retries: Formora may implement a retry policy for failed webhook deliveries. Consult Formora’s specific documentation or support for details on retry attempts and backoff strategies.